
- July 9, 2026
- Universal White Cement
- Pool Plaster
- No Comments
How to Tell if Pool Plaster is Delaminating
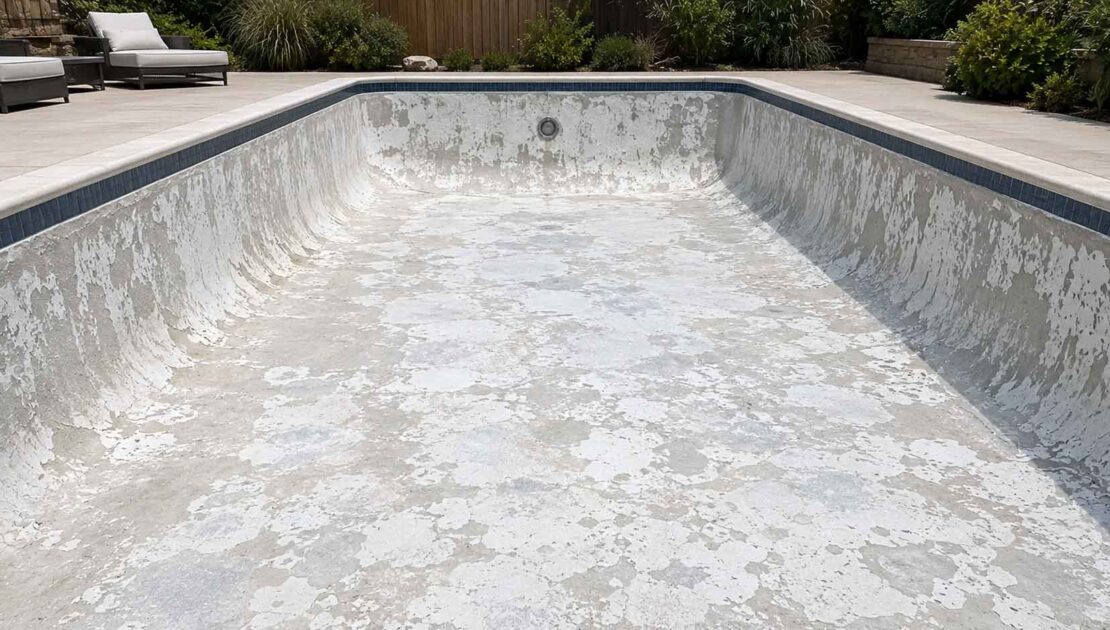
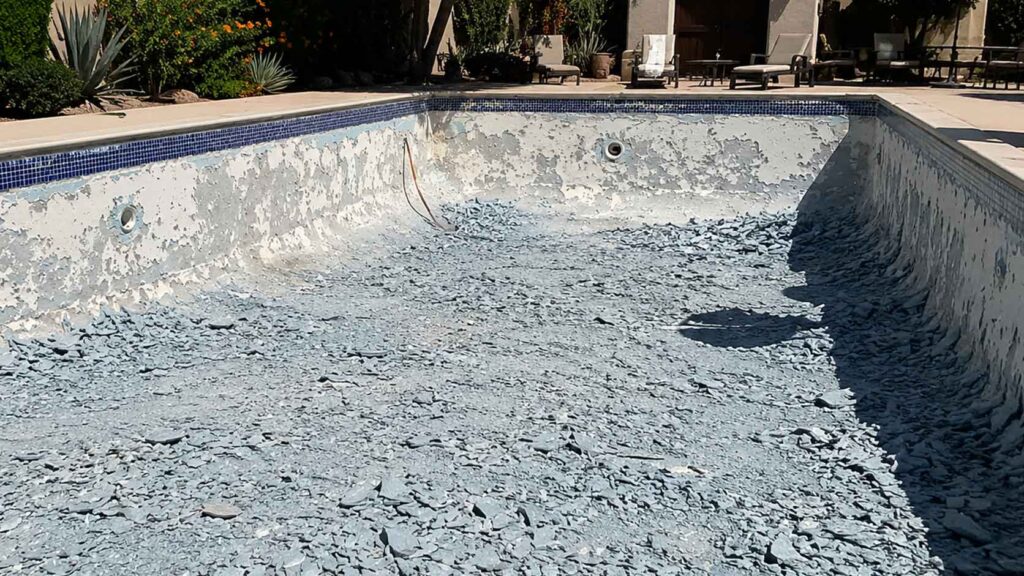
When plaster delaminates, it’s not just a cosmetic issue—it’s a bond failure. The finish is separating from the shell or bond coat, and sooner or later that turns into pop‑offs, hollow areas, and bigger tear‑outs than anyone budgeted for. As pros, we need to be able to spot delamination early, explain it clearly, and decide whether we’re looking at patch work or a full resurfacing situation.
Below is practical guidance written for plasterers, builders, and service techs working with high‑quality white cement plaster, including universal white cement systems.
What is Pool Plaster Delamination?
In simple trade terms, delamination is when the plaster finish loses its bond to the underlying surface—the gunite/shotcrete shell or a previous plaster layer. The plaster may still look “okay” from a distance, but physically it’s no longer attached the way it should be.
It’s important to distinguish delamination from other surface problems:
- Etching and scaling are chemistry issues in the top layer of plaster, not a bond problem.
- Crazing and shrinkage cracks are often mix/curing issues, but the plaster can still be well bonded to the shell.
- Calcium nodules and “volcanoes” can be symptoms of underlying micro‑cracks or small voids, but not every nodule means full‑on delamination.
If the issue is at the interface—the bond line—then you’re dealing with delamination. That’s a different conversation than “the plaster looks rough” or “the color is mottled.”
What Causes Pool Plaster to Delaminate?
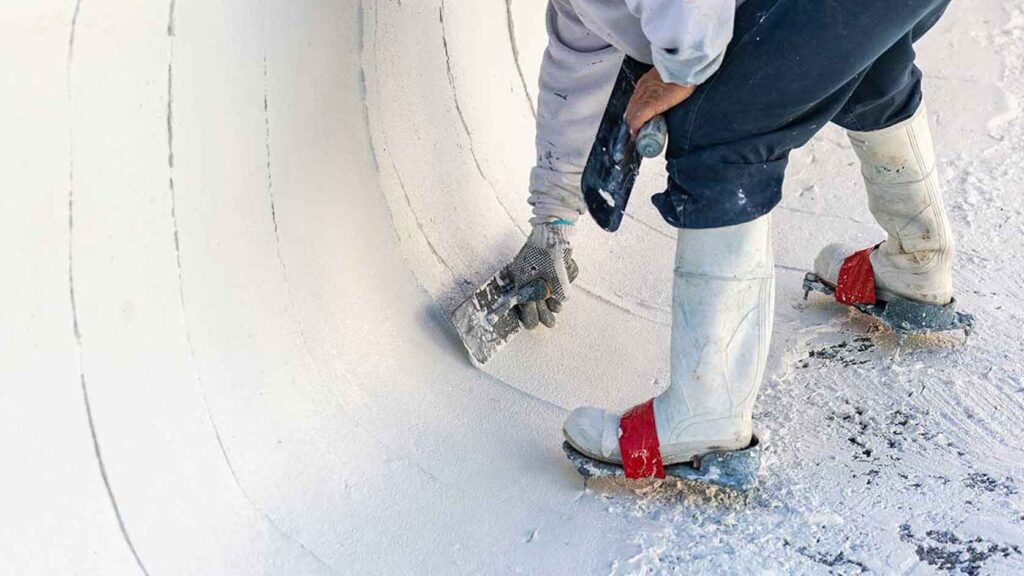
Delamination almost always goes back to what happened before or during plastering, not just what the water did later. Common root causes include:
- Inadequate substrate prep: Dust, laitance, paint, loose old plaster, algae, or scale left on the shell will block proper bonding.
- Poor bond coat practices: Wrong product, poor coverage, contamination between bond coat and plaster, or bond coat applied over a dirty surface.
- Cold joints and “start/stop” areas: When crews stop and restart, especially in hot, dry conditions, you can end up with weak planes where plaster separates later.
- Over‑troweling and burnishing: Chasing a glassy look at the expense of proper compaction and mechanical key can leave you with a dense surface but a weaker bond line.
- Multiple layers and skim coats: Stacking thin layers of plaster over marginal existing finishes is a recipe for separation down the road.
A good universal white cement gives you a stable, predictable base material, but it can’t fix a dirty shell or bad bond coat. Delamination is usually a process problem, not a cement problem.
Visual Clues That Suggest Pool Plaster Delamination
Before you tap anything, there are visual clues that should make your antenna go up:
- Odd blotches or “maps” in the finish: Irregular patches that don’t match the surrounding texture or color, often with softer edges.
- Raised or blister-like areas: Spots that look slightly puffed up, volcano‑shaped mounds, or domes on floors and walls.
- Patches near fittings and transitions: Around lights, returns, tile lines, steps, and benches where thickness changes or where the crew had to work around obstacles.
- Localized cracking patterns: Circular or spider cracks focused around one patch of plaster rather than a straight structural crack through the shell.
None of these prove delamination on their own, but they’re classic “look closer” signals. When you see them, it’s time to get systematic with your inspection.
The Hollow‑Sound Test: Your Best Field Tool
The simplest and most reliable field test for delamination is listening.
Here’s how to do it like a pro:
- Use a non‑marring tool: The plastic handle of a screwdriver, a rubber mallet, or a hard plastic tapping tool. Avoid metal that can chip the surface.
- Work in a grid: On floors, move in a pattern—every foot or two—and tap lightly, listening for changes in tone. Do the same on walls, especially in suspect areas.
- Learn the “solid” vs “hollow” sound: Solid plaster bonded well to the shell produces a crisp, tight sound. Delaminated areas sound dull, hollow, or drum‑like, and often the tone changes abruptly at the edge of the problem area.
- Check around hot spots: Lights, returns, main drains, skimmers, steps, benches, and dam walls are common trouble zones.
- Mark what you find: Use a wax pencil or tape to outline hollow spots so you can photograph and measure them later.
You can do this testing with the pool filled or drained, but remember water will change how sound travels. Drained inspections give you the clearest feedback; underwater work is better than guessing, but it takes more experience to interpret.
Delamination vs Other Look‑Alike Problems
A lot of surface issues can be misread as delamination. Good diagnostics save you from mislabeling and mispricing the job.
Calcium nodules and pop‑offs
- Nodules are often small mounds or “volcanoes” that exude calcium, usually on floors or in micro‑cracked areas.
- They may or may not sit over a true delaminated void; you still need to tap around them.
- Treat them as possible indicators, not automatic proof of debonding.
Spalling and flaking
- Surface spalling is where the top cream layer breaks away due to chemistry or freeze‑thaw, while the underlying plaster remains bonded.
- Flaking at the very surface can look bad but may not involve a bond failure at the shell.
Etching and scaling
- Etched surfaces feel soft, chalky, or pitted, but they’re usually chemistry damage in the top few millimeters.
- Scaling is mineral buildup on the surface; once removed, you may find the plaster itself is still bonded.
The simple rule: if it doesn’t sound hollow and there’s no evidence of separation at the bond line, it’s probably not delamination. You still might have a serious surface issue, but the repair approach will be different.
How Serious Is Pool Plaster Delamination? Patch vs Replaster
Once you’ve identified delaminated areas, you need to decide how big a deal they are. That’s part art, part science, and part experience.
You can think in three tiers:
- Small, isolated areas: A handful of localized spots, often around fittings or in corners. These can sometimes be chipped out and patched, especially if the rest of the surface is in good condition.
- Patterned or spreading delamination: When hollow areas show up across multiple zones or follow a consistent pattern (e.g., all along one wall or under a tile line), that points to systemic bond issues. Patch work may just be kicking the can down the road.
- Widespread separation: Large sections of floor or wall sound hollow or show visual signs of lifting. At that point, you’re looking at a full‑scale replaster, not spot fixes.
You also need to factor in:
- Age of the plaster: A new or relatively young finish with delamination suggests more serious underlying issues than an old finish working toward the end of its life.
- Safety and liability: Areas that are actively popping off, creating sharp edges, or dropping debris into the system are higher priority, even if they’re small.
- Water intrusion: Voids behind delaminated plaster can be pathways for water and potential structural or rust issues.
Be honest in your assessment. Sometimes the most professional answer is, “This isn’t a patch job anymore; it’s time to plan a full resurfacing.”
Communicating Delamination to Homeowners and Builders
The way you explain this problem matters. Most homeowners have never heard the term “delamination,” and many builders don’t want to hear it.
A few tips:
- Use simple language: “The plaster has come loose from the shell underneath in some areas,” is more understandable than “we have bond failure at the substrate.”
- Show, don’t just tell: Let them hear the hollow sound compared to solid areas and see the marked patches. Photos and short videos go a long way.
- Separate bond issues from chemistry issues: Make it clear when the problem is tied to prep and application versus long‑term maintenance. That helps everyone understand responsibility.
- Set realistic expectations: Explain that patches in a system with widespread delamination may not be a long‑term solution, and that more separation can appear in the future.
Handling the conversation professionally protects your reputation and builds trust, even when you’re delivering bad news.
Preventing Delamination on Future Jobs
The best delamination article is the one that convinces crews to avoid creating the problem in the first place. From a plasterer’s standpoint, prevention means tightening up the process:
- Inspect the shell thoroughly: Look for loose material, paint, scale, hollow spots in old plaster, and signs of prior bond failures. Don’t plaster over what you know is suspect.
- Clean and prepare correctly: Pressure wash, acid etch or mechanically profile as needed, and remove all dust, debris, and contaminants before any bond coat goes down.
- Use the right bond coat and apply it properly: Follow the manufacturer’s spec for coverage, thickness, and cure time. Don’t apply plaster over a dirty or poorly cured bond coat.
- Maintain mix and troweling discipline: Keep ratios consistent, manage set times, avoid over‑troweling, and make sure each area is properly compacted and keyed.
- Respect cure and fill windows: Don’t rush from trowel to fill in ways that undermine bond. Follow recommended timing for universal white cement and your overall plaster system.
A well‑designed white cement, used inside a disciplined process like this, gives you a strong shot at avoiding delamination altogether. When the bond is right and chemistry is reasonably managed, plaster should stay attached and age gracefully, instead of peeling and popping long before its time